-
Amazon Web Services (AWS) Direct Connect Overview
-
This section describes how to activate or deactivate your Verizon Secure Cloud Interconnect (SCI) Customer Connection to your Amazon Web Services (AWS) Account. The activation will establish a network connection to your AWS Account. The deactivation will remove the network connection from your AWS Account.
Note: Please make sure you have read the main Verizon SCI Welcome Kit to understand the main SCI principles, please go to https://www.verizon.com/business/welcome-kits/sci/
Note: Please make sure you have read AWS Direct Connect service information, please go to https://aws.amazon.com/directconnect/
Note: The SCI Customer Connection activation and deactivation can only be performed after the SCI Customer Connection is successfully added to your Verizon Account.
Note: To remove the SCI Customer Connection from your Verizon Account you need to place a disconnect order through the Verizon Enterprise Centre customer portal or you can ask your Verizon Account Team to place a disconnect order.
- Please make sure to first deactivate your SCI Customer Connection before you remove the connection from your Verizon Account by following the deactivation procedure below.
- Please make sure you have read “The rules for change and disconnect Aggregated Billing orders” section in the main Verizon SCI Welcome Kit.
Note: In case you require AWS Direct Connect virtual interfaces of type “Transit” to establish a network connection to Amazon Transit Gateway, then please order a SCI Customer Connection configured with SCI partner Equinix and partner service Amazon. That provides you the option to manually configure an Amazon virtual interface of type “Transit”.
Note: SCI Customer Connections configured with SCI partner Amazon supports AWS Direct Connect virtual interfaces of type “Private” or type “Public” depending on the ordered SCI Amazon partner service. Future development is planned to support type “Transit” as well. Please check the status of this development with your Verizon Account Team.
- Overview
- Preparation
- Common steps
- Option 1: Activation of dedicated private peering service
- Option 1: Deactivation of dedicated private peering service
- Option 2: Activation of dedicated public peering service with Verizon provided NAT
- Option 2: Deactivation of dedicated public peering service with Verizon provided NAT
- Option 3: Activation of dedicated public peering service with customer provided NAT
- Option 3: Deactivation of dedicated public peering service with customer provided NAT
-
- Please make sure you can login into the Verizon Enterprise Center customer portal. For activation and deactivation of your SCI Customer Connection you will need to use the Verizon Dynamic Network Manager tool which can be found under the Tools menu. Please check the main Verizon SCI Welcome Kit for how to identify your SCI Customer Connection in your Verizon Account.
Note: You can login into the Verizon Enterprise Center customer portal on the following link: https://sso.verizonenterprise.com/
Note: In case Verizon Dynamic Network Manager does not list your SCI Customer Connection then please check which Billing Account Number (BAN) has been used for ordering and if you are entitled to this BAN which you can check in your Verizon Enterprise Center customer portal user profile. In case you are not entitled then request entitlement through the portal.
Note: After your new SCI order has been submitted for provisioning it can take up to 8 hours before the SCI Customer Connection becomes visible in Verizon Dynamic Network Manager.
- In Verizon Dynamic Network Manager your SCI Customer Connection partner service field provides you the information which peering service has been ordered.
The partner service field in Verizon Dynamic Network Manager looks like the below example.
The following SCI AWS partner services exist:
Partner service
Peering service
Amazon Direct Connect virtual interfaces
AWS Direct Connect - Ded VPC Option 1
Will create two Verizon hosted Amazon private virtual interfaces
AWS Direct Connect - Ded non VPC Option 2
Will create two Verizon hosted Amazon public virtual interfaces, with in the Verizon Network a Verizon provided NAT function
AWS - Ded non-VPC - Cust Prov NAT Option 3
Will create two Verizon hosted Amazon public virtual interfaces, without a Verizon provided NAT function. You can provide your own NAT device.
Your SCI Customer Connection has been ordered for a specific partner location.
The Partner Location field in Verizon Dynamic Network Manager looks like the below example.
The below table provides you the lookup for the associated Amazon region based on the ordered partner location:Partner Location
AWS Region Name
AWS Region Code
US East (EquinixDC1 Ashburn)
US East (N. Virginia)
us-east-1
US East (New York, CoreSiteNY1)
US East (N. Virginia)
us-east-1
US East (Ohio Equinix CH2)
US East (Ohio)
us-east-2
Houston, TX
US East (Ohio)
us-east-2
US West (EquinixSV1 Silicon Vly)
US West (N. California)
us-west-1
US West (Los Angeles, CoreSiteLA1)
US West (N. California)
us-west-1
US West (Equinix SE2 Oregon)
US West (Oregon)
us-west-2
US West (SuperNAP 8 Oregon)
US West (Oregon)
us-west-2
Canada (Cologix Montreal)
Canada (Central)
ca-central-1
EU West (Eircom, Dublin)
Europe (Dublin)
eu-west-1
EU West (Telecity London)
Europe (Dublin)
eu-west-1
EU West 2 (Equinix LD5 London)
Europe (London)
eu-west-2
EU West 3 (TH Voltaire, Paris)
Europe (Paris)
eu-west-3
EU (Frankfurt, EquinixFR5)
Europe (Frankfurt)
eu-central-1
AsiaPac (Equinix SG2 Singapore)
Asia Pacific (Singapore)
ap-southeast-1
AsiaPac (Equinix TY2 Tokyo)
Asia Pacific (Tokyo)
ap-northeast-1
AsiaPac (Equinix SY3 Sydney)
Asia Pacific (Sydney)
ap-southeast-2
AsiaPac (GPX Mumbai)
Asia Pacific (Mumbai)
ap-southeast-1
Southam (Terremark Sao Paulo)
South America (Sao Paulo)
sa-east-1
US West (Equinix SV1 Gov)
AWS GovCloud (US)
us-gov-west-1
Note: AWS Direct Connect with the use of a Direct Connect Gateway allows you to use your SCI Customer Connection with any region mentioned in the list and any other region not mentioned in the list part of AWS public cloud.
Note: Please contact your Verizon Account Team in case you require a location which is not mentioned in the list.
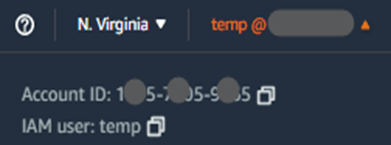
Your SCI Customer Connection activation requires your AWS 12 digits Amazon Account ID. For activating your SCI Customer Connection, you login into the AWS web console, select the corresponding Amazon region, select the direct connect service and accept the Verizon hosted Amazon virtual interfaces. In case you do not login the Verizon hosted Amazon virtual interfaces stay in state “pending” for acceptance.
The AWS Account sign in (web console) looks like the below example.

Note: The Amazon Web console can be found on the following link https://console.aws.amazon.com
The required 12 digits Amazon Account ID can also be found by clicking on your IAM user name in the top right corner of the Amazon Web console like below example.
Note: In case your 12 digits Amazon Account ID holds a leading ’0’ then use the leading ‘0’ in the Verizon Dynamic Network Manager SCI Customer Connection activation as well.
Note: The 12 digits Amazon Account ID for the Verizon Dynamic Network Manager SCI Customer Connection activation does not include the two ‘-’ signs. Use the copy button or remove the two ‘-’ signs manually from the Amazon Account ID.
Summary preparation steps for activating or deactivating your SCI Customer Connection.
Login into the Verizon Enterprise Center customer portal.
- Select the Verizon Dynamic Network Manager tool.
- Select the Secure Cloud Interconnect menu.
- Search for your SCI Customer Connection Service ID.
- Identify according to step 2 which peering option you have ordered (1, 2 or 3).
Login into the Amazon web console.
- Identify according to step 3 the corresponding Amazon region.
- Select the Amazon region in the console.
- Select the Direct Connect service.
You can then proceed to the specific option 1, 2 or 3 activation or deactivation section.
- Please make sure you can login into the Verizon Enterprise Center customer portal. For activation and deactivation of your SCI Customer Connection you will need to use the Verizon Dynamic Network Manager tool which can be found under the Tools menu. Please check the main Verizon SCI Welcome Kit for how to identify your SCI Customer Connection in your Verizon Account.
-
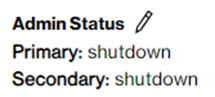
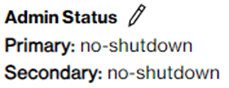
Before activating your SCI Customer Connection, you can consider using the “Administrative status” in state “shutdown” to prevent enabling network traffic at the time of activation.
You will then need to use the “Administrative status” state “no-shutdown” to manually enable network traffic at the date and time you require it.

-
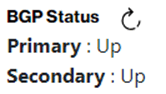
After you activated your SCI Customer Connection and you decided to keep the “Administrative status” in state “no-shutdown” then “BGP Status” state will be “Up”. You can verify the “BGP Status” by pressing the “BGP Status” button.
You then also need to verify if BGP is advertising and receiving network routing prefixes. This can be verified by using the diagnostic commands “received-routes” and “advertised-routes” in the Verizon Dynamic Network Manager “Diagnostics” menu. The network traffic will only start when BGP advertises and receives network routing prefixes.
After you have verified that the SCI Customer Connection receives and advertises network routing prefixes you can consider the activation successful.
-
Instead of deactivating your SCI Customer Connection you can consider to use the “Administrative status” state “shutdown” in case the network traffic needs to be stopped for a short period of time.
Note: In case you continue with the “Deactivate” button you will need to use the “Activation” procedure to re-establish the connection which requires that you have access into your cloud provider account.
The “Administrative status” supports two states: “shutdown” or “no-shutdown”. In case you change the state to “shutdown” the “BGP Status” state will change to state “Down”. The network traffic is disabled.


Remember that after the short period of time you then need to re-enable the traffic yourself by changing the state to “no-shutdown” which brings the “BGP Status” back to state “Up”.

-
After you deactivate your SCI Customer Connection, you may consider disconnecting the SCI Customer Connection permanently from your Verizon Account. You then need to raise a disconnect order in the Verizon Enterprise Center customer portal or contact your Verizon Account Team to place a disconnect order.
Note: Please make sure you have read the “The rules for change and disconnect Aggregated Billing orders” section in the main Verizon SCI Welcome Kit before placing the disconnect order.
-
Please check the common activation start step.
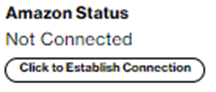
The SCI Customer Connection provides a “Click to Establish Connection” button. By pressing the button, the activation screen pops up.
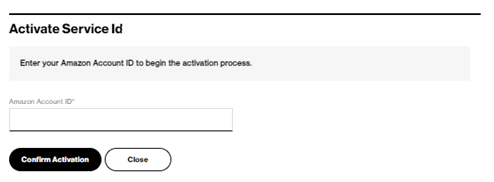
In the below Activation screen enter your AWS Account ID in the empty field and press the “Confirm Activation” button.

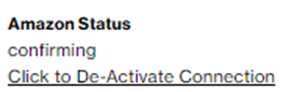
The activation process creates two AWS Direct Connect virtual hosted interfaces of type “Private” which will be in state “confirming”. After closing the window, the SCI Customer Connection shows Amazon Status “confirming”.

Login into your AWS Account and search for “Direct Connect”.
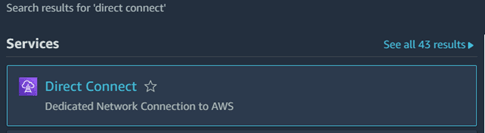
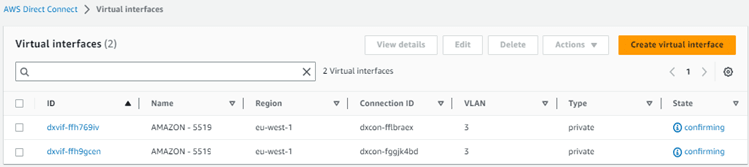
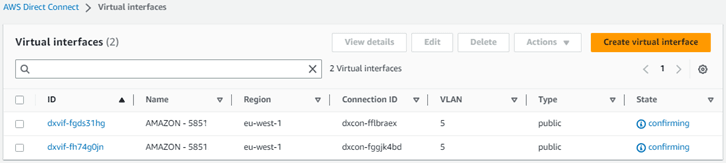
Select the service and look in the menu Interfaces. When you search for the SCI Customer Connection Service ID you will find two Verizon hosted Amazon private virtual interfaces (VIF’s) in state “confirming”.
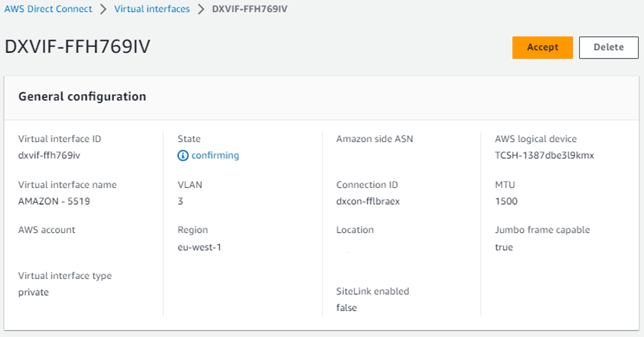
Click on the first interface ID and in the next screen press the “Accept” button.
The AWS acceptance procedure will require you to select a Virtual Private Gateway or Direct Connect Gateway. One of these should already have been created.
Note: When you create an AWS Direct Connect Gateway you can assign a BGP Autonomous System Number (ASN) which is default set to 64512. In case you change the AWS default value please make sure to modify the SCI Customer Connection Amazon AS Number in the Verizon Dynamic Network Manager “Details” menu by clicking the pencil and modify the Amazon AS Number to the value you will be using.

Press “Accept virtual interface”.
After acceptance the screen returns to the interface menu.

Click on the second interface ID and accept the interface by selecting the same gateway.
The two Amazon private virtual interfaces will start changing state, first to “pending”, then to “down” and final to “available”. Available means that the connection and the routing protocol BGP has been established.

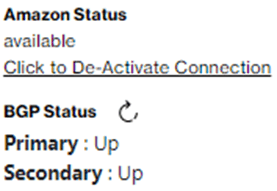
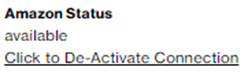
Switch back to Verizon Dynamic Network Manager, the SCI Customer Connection shows Amazon Status “available”. Press the “BGP Status” button, which returns the Primary and Secondary state “Up”.
Note: In case BGP does not establish successfully, check if the SCI Customer Connection Amazon AS Number is matching with the AS number of your Direct Connect Gateway.
Note: In case your SCI Customer Connection continues to show “BGP Status” state “Down” then your SCI Customer Connection prefix advertisement can be incorrectly configured. Please check the next step about route advertisement.
You can verify the SCI Customer Connection egress route filter configuration in the Verizon Dynamic Network Manager “Network Settings” menu. For SCI partner Amazon option 1 peering the default configuration is presented like below:

“Distribute List Default Only” allows only your default route to be advertised to Amazon. With this configuration your SCI Customer Connection will not exceed Amazon maximum received route limit of 100 prefixes for Amazon private virtual interfaces.
Note: In case you don’t see a filter mentioned that means there is no filter configured. No egress route filter can be requested to your Verizon Account Team for Private IP VPN which stay below 100 routing prefixes. In case 100 prefixes are exceeded Amazon brings BGP into state “Down” which causes that no network traffic will pass.
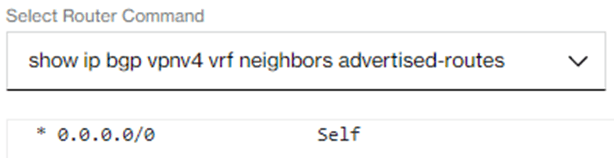
In case your Private IP VPN contains a default route then Verizon Dynamic Network Manager “Diagnostics” menu command “advertised-routes” will show the below result.
In case your Private IP VPN does not contain a default route then contact your Verizon Account Team for a modification of the egress route filter.
You can choose from the below five options for advertising routing prefixes to your Amazon private virtual interfaces:
Option
Description
No Filter
All your Private IP VPN prefixes will be advertised to the Amazon private virtual interface.
Allow Default Only
The default SCI egress route filter configuration which allows only your customer default prefix and will deny all other prefixes, this filter stays below 100 prefixes.
Deny Default Only
In case you have a default route conflict in Amazon then you can use this option, all other prefixes will be advertised so the total number of prefixes must stay below 100.
Default Originate
In case you use the default route to Amazon but your Private IP VPN does not have a default route. The default route is injected by your SCI Customer Connection and is only sent to Amazon and not advertised into your Private IP VPN.
BGP Community
In case your network design supports BGP Community, connected routers to Private IP can tag an agreed BGP community value like 65000:8000 to a customer advertised routing prefix. Your SCI Customer Connection configured to allow BGP community 65000:8000 will then only advertise your tagged prefix. Or the BGP Community filter can be configured to deny a specific BGP Community.
Note: For extra information see as well the main Verizon SCI Welcome Kit section “Verification of Network Settings Phase”.
You can use the Verizon Dynamic Network Manager “Diagnostics” menu to check for received routing prefixes from Amazon.
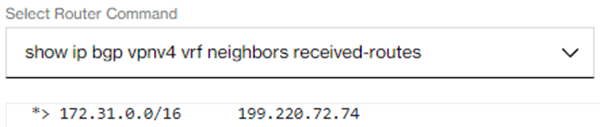
Note: In case the maximum advertised route limit of 100 is exceeded then Amazon forces BGP into state “Down” and the received routes command will show an empty result as well.
In case you are using a Virtual Private Gateway you only receive routing prefixes when the Virtual Private Gateway is attached to your Virtual Private Cloud (VPC). The VPC CIDR IP address block will then be received from Amazon and distributed into your Private IP VPN.
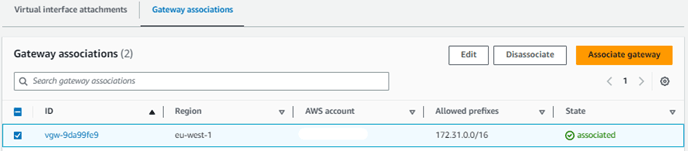
In case you are using a Direct Connect Gateway associated to (multiple) Virtual Private Gateways make sure you have each Direct Connect Gateway to Virtual Private Gateway association configured with the correct Allowed Prefixes to support your VPC CIDR IP address block else no routing prefix will be received by your SCI Customer Connection.
See below an example of a Direct Connect Gateway with Allowed prefixes from the associated Virtual Private Gateway (attached to your VPC).
Please check the common activation end step.
-
Please check the common deactivation start step.
The SCI Customer Connection provides a “Deactivate” button.
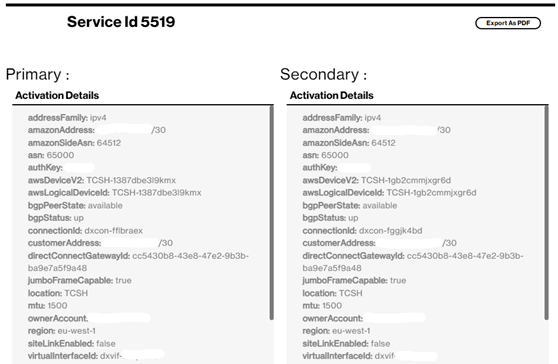
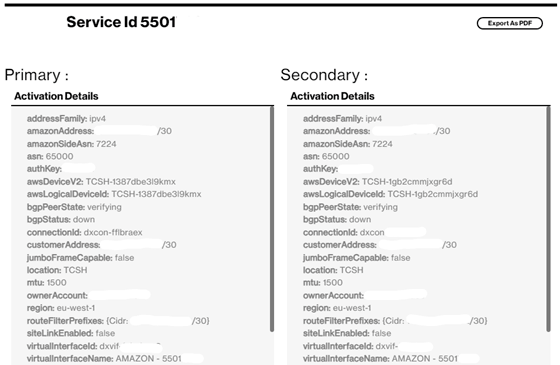
By pressing the button, the deactivation screen pops up. This screen shows the cloud connection details so that you can verify the details before deactivating the connection.

Press “Confirm Deactivate” or press “Close” to cancel the deactivation. The “Confirm Deactivate” will immediately delete both Amazon private virtual interfaces from your AWS Account. The SCI Customer Connection will stop exchanging customer traffic with Amazon. After pressing “Confirm Deactivate” the following screen appears and the Amazon private virtual interfaces will be in state “deleting” or “deleted” which cannot be reverted.


Press “Close” to leave the deactivation procedure.
As long as the Amazon private virtual interfaces are in state “deleting” any attempt to activate this specific SCI Customer Connection will fail because the VLAN IDs are still in use by Amazon.
You can check the Amazon virtual interface status in your AWS web console, after a few minutes the Amazon private virtual interfaces will change to state “deleted”. Only then you can make a successful new SCI Customer Connection activation.
Please check the common deactivation end step.
-
Please check the common activation start step.
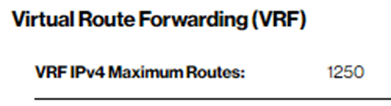
Before you activate the SCI Customer Connection for public peering with Verizon provided Network Address Translation (NAT), make sure your Private IP VPN can support the amount of routing prefixes that Amazon public peering will be advertising to you. Your Private IP VPN is by default limited to a maximum amount of 1250 routing prefixes.
You can check your SCI Customer Connection specific routing prefix limit in the Verizon Dynamic Network Manager “Network Settings” menu.
Note: Contact your Verizon Account Team in case you need a maximum routing prefix increase.
You can access all AWS prefixes through this connection; for example, Amazon EC2, Amazon S3, and Amazon.com. If your VRF table does not have the space to accommodate the additional AWS advertised routes, please request your Verizon Account Team to increase your Private IP VPN maximum routing prefix limit. You can find the AWS IP address ranges on the following link https://docs.aws.amazon.com/general/latest/gr/aws-ip-ranges.html
The public peering prefixes will be distributed through the Verizon provided NAT function to your locations connected to your Private IP VPN. This makes it possible for the locations to initiate outbound IP NAT sessions to Amazon services. The source IP address of your network traffic will be replaced with the source IP of the Verizon provided public NAT IP address. Amazon services cannot initiate inbound sessions to your locations because inbound sessions are blocked by the Verizon NAT function.
The SCI Customer Connection provides a “Click to Establish Connection” button. By pressing the button, the activation screen pops up.

Enter your AWS Account ID in the empty field and press the “Confirm Activation” button.
The activation process creates two AWS Direct Connect virtual interfaces of type “Public” which will be in state “confirming”. After closing the window, the SCI Customer Connection shows Amazon Status “confirming”.
Login into your AWS Account and search for “Direct Connect”.

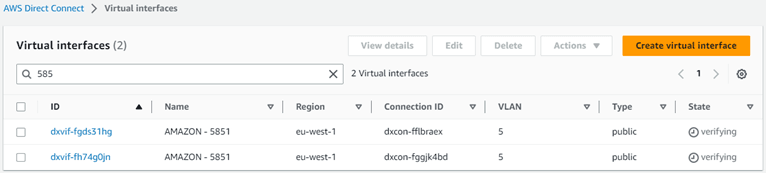
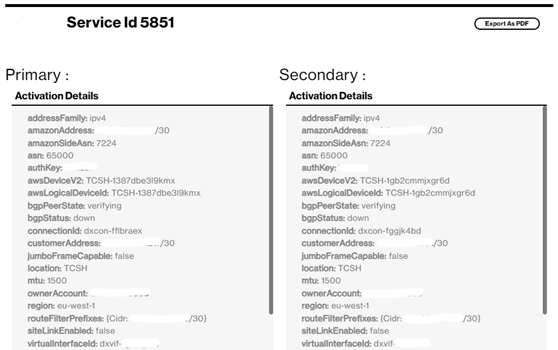
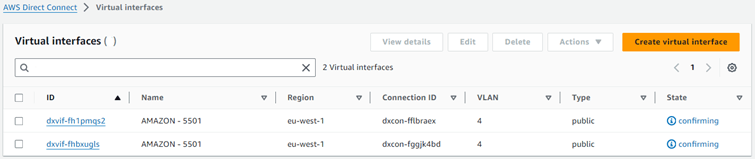
Select the service and look in the menu Interfaces. Search for the SCI Customer Connection Service ID which will find two Amazon public virtual interfaces (VIF’s) in state “confirming”.
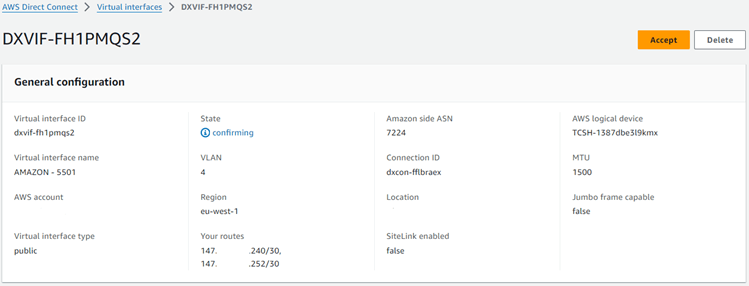
Click on the first interface ID and in the next screen press the “Accept” button.
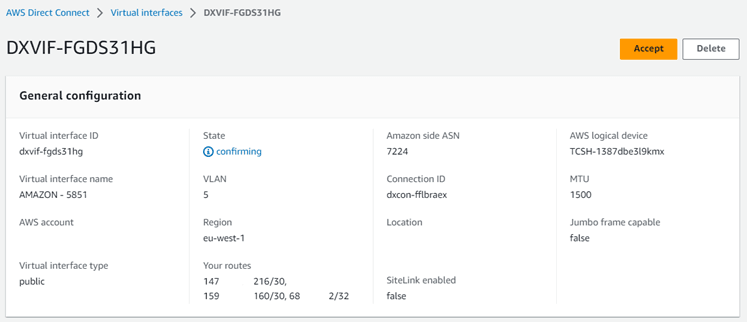
For public interfaces the AWS acceptance procedure will require you to only press “Confirm”.
Click on the second interface ID and in the next screen press the “Accept” button followed by the “Confirm” button.
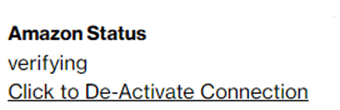
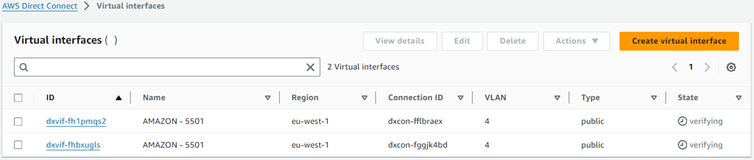
The two Amazon public virtual interfaces will change to state “verifying”.
Switch back to Verizon Dynamic Network Manager, the SCI Customer Connection shows Amazon Status “Verifying”.
You then contact your Verizon Account Team to provide you a Letter of Authorization (LOA) for both the Verizon provided IP subnets used for the two Amazon public virtual interfaces and the Verizon provided Network Address Translation (NAT) IP address assigned to your SCI Customer Connection.
Your Verizon Account Team will provide you the following Letter of Authorization (LOA):
Note: Replace the text between [] with the actual information.
LETTER OF AUTHORIZATION (LOA)
[Date]
To whom it may concern,
This letter serves as authorization for [AWS Account Name] with Account Number: [AWS Account Number for the Public VIF]
to advertise the following IP address blocks over:
1) The primary AWS Public Virtual Interface [vif-xxxxx]:
[Primary IP address block /30]
[Secondary IP address block /30]
[NAT IP address block /32]
&
2) The secondary AWS Public Virtual Interface [vif-xxxxx]:
[Primary IP address block /30]
[Secondary IP address block /30]
[NAT IP address block /32]
Which belongs to the product Verizon Secure Cloud Interconnect Service ID [xxxxxxxxxx].
From,
[Full Name]
[Designation]
[IP Owner Company Name]
[IP Owner email ID]
You then provide the LOA to Amazon via a support case or in case you do not have a support plan you can send an email to [email protected].
Only you can authorize Amazon to move the Amazon public virtual interfaces to state “available” because you are the owner of the interfaces. Verizon is hosting “your” Amazon public virtual interfaces on the Verizon owned physical Direct Connect connection.
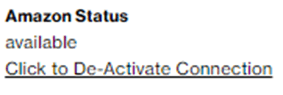
After Amazon processed your case, the public interfaces will automatically change to state “available” and “BGP Status” will show state “Up” for both interfaces.
Please check the common activation end step.
-
Please check the common deactivation start step.
The SCI Customer Connection provides a “Deactivate” button.
By pressing the button, the deactivation screen pops up. This screen shows the cloud connection details so that you can verify the details before deactivating the connection.

Press “Confirm Deactivate” or press “Close” to cancel the deactivation. The “Confirm Deactivate” will immediately delete both Amazon public virtual interfaces from your AWS Account. The SCI Customer Connection will stop exchanging customer traffic with Amazon. After pressing “Confirm Deactivate” the following screen appears and the Amazon public virtual interfaces will be in state “deleting” or “deleted” which cannot be reverted.


Press “Close” to leave the deactivation procedure.
As long as the Amazon public virtual interfaces are in state “deleting” any attempt to activate this specific SCI Customer Connection will fail because the VLAN IDs are still in use by Amazon.
You can check the Amazon public virtual interface status in your AWS web console, after a few minutes the Amazon public virtual interfaces will change to state “deleted”. Only then you can make a successful new SCI Customer Connection activation.
Please check the common deactivation end step.
-
Please check the common activation start step.
For option 3 the main Verizon SCI Welcome Kit advises to use as an example a new Private IP VPN B (it can be a different name as well). The Private IP VPN B provides the transport of the Amazon public peering traffic to your on-premise Network Address Translation (NAT) device.
Note: Your SCI Customer Connection should have been ordered for this new Private IP VPN B. Verify in Verizon Dynamic Network Manager “VPN” menu to which Private IP VPN your connection is connected. In case it shows the wrong Private IP VPN ask your Verizon Account Team to re-connect it to your Private IP VPN B.
Before you activate the SCI Customer Connection for public peering with your customer provided NAT, make sure your Private IP VPN B can support the amount of routing prefixes that Amazon public peering will be advertising to you. Your Private IP VPN B is by default limited to a maximum amount of 1250 routing prefixes.
You can check your SCI Customer Connection specific routing prefix limit in the Verizon Dynamic Network Manager “Network Settings” menu.

Note: Contact your Verizon Account Team in case you need a maximum routing prefix increase.
You can access all AWS prefixes through this connection; for example, Amazon EC2, Amazon S3, and Amazon.com. If your Private IP VPN B VRF table does not have the space to accommodate the additional AWS advertised routes, please request your Verizon Account Team to increase your Private IP VPN B maximum routing prefix limit. You can find the AWS IP address ranges on the following link https://docs.aws.amazon.com/general/latest/gr/aws-ip-ranges.html
The public peering prefixes will be distributed by Private IP VPN B to the location of your on-premise NAT device. You can make it possible for the locations to initiate outbound IP NAT sessions to Amazon services. Your NAT device will then need to replace the source IP address of your location network traffic by a public IP address provided by yourself. Amazon services can or cannot initiate inbound sessions to your location depending on how you configure your NAT device.
In case you have other Private IP VPNs like Private IP VPN A which needs to make use of your on-premise NAT device then use Private IP Multi VRF for this location to route Private IP VPN A traffic to the location so that it can use the NAT device to access Amazon public peering services.
The SCI Customer Connection provides a “Click to Establish Connection” button. By pressing the button, the activation screen pops up. Enter your AWS Account ID in the empty fields and press the “Confirm Activation” button.

The activation process creates two AWS Direct Connect virtual interfaces of type “Public” which will be in state “confirming”. After closing the window, the SCI Customer Connection shows Amazon Status “confirming”.

Login into your AWS Account and search for “Direct Connect”.

Select the service and look in the menu Interfaces. Search for the SCI Customer Connection Service ID which will find two Amazon public virtual interfaces (VIF’s) in state “confirming”.
Click on the first interface ID and in the next screen press the “Accept” button.
Click on the second interface ID and in the next screen press the “Accept” button.
The two Amazon public virtual interfaces will change to state “verifying”.
You then contact your Verizon Account Team to provide you a Letter of Authorization (LOA) for only the Verizon provided IP subnets used for the two Amazon public virtual interfaces.
Your Verizon Account Team will provide you the following Letter of Authorization (LOA).
Note: This LOA only includes the Verizon Primary and Secondary /30 address blocks.
Note:Replace the text between [] with the actual information.
LETTER OF AUTHORIZATION (LOA)
[Date]
To whom it may concern,
This letter serves as authorization for [AWS Account Name] with Account Number: [AWS Account Number for the Public VIF]
to advertise the following IP address blocks over:
1) The primary AWS Public Virtual Interface [vif-xxxxx]:
[Primary IP address block /30]
[Secondary IP address block /30]
&
2) The secondary AWS Public Virtual Interface [vif-xxxxx]:
[Primary IP address block /30]
[Secondary IP address block /30]
Which belongs to the product Verizon Secure Cloud Interconnect Service ID [xxxxxxxxxx].
From,
[Full Name]
[Designation]
[IP Owner Company Name]
[IP Owner email ID]
You then provide the LOA to Amazon via a support case or in case you do not have a support plan you can send an email to [email protected].
Note: In the same case you will need to provide your own public NAT IP to Amazon so that Amazon implements both Verizon /30 and your public NAT IP in the same support case.
Only you can authorize Amazon to make the Amazon public virtual interfaces available because you are the owner of the interfaces. Verizon is hosting “your” Amazon public virtual interfaces on the Verizon owned physical Direct Connect connection.
After Amazon processed your case, the public interfaces will automatically change to state “available” and “BGP Status” will show state “Up” for both interfaces.
Please check the common activation end step.
-
Please check the common deactivation start step.
The SCI Customer Connection provides a “Deactivate” button.
By pressing the button, the deactivation screen pops up. This screen shows the cloud connection details so that you can verify the details before deactivating the connection.

Press “Confirm Deactivate” or press “Close” to cancel the deactivation. The “Confirm Deactivate” will immediately delete both Amazon public virtual interfaces from your AWS Account. The SCI Customer Connection will stop exchanging customer traffic with Amazon. After pressing “Confirm Deactivate” the following screen appears and the Amazon public virtual interfaces will be in state “deleting” or “deleted” which cannot be reverted.


Press “Close” to leave the deactivation procedure.
As long as the Amazon public virtual interfaces are in state “deleting” any attempt to activate this specific SCI Customer Connection will fail because the VLAN IDs are still in use by Amazon.
You can check the Amazon public virtual interface status in your AWS web console, after a few minutes the Amazon public virtual interfaces will change to state “deleted”. Only then you can make a successful new SCI Customer Connection activation.
Please check the common deactivation end step.
Services and/or features are not available in all countries/locations, and may be procured from in-country providers in select countries. We continue to expand our service availability around the world. Please consult your Verizon representative for service availability. Contact us.